

Tilt Slab Construction in NZ: How It Works and When to Use It
Tilt slab construction is one of the fastest and most cost-effective methods for commercial and industrial buildings in New Zealand. Here is a complete explanation of how the process works, when it makes sense, and what you need to know before choosing it.
What Is Tilt Slab Construction?
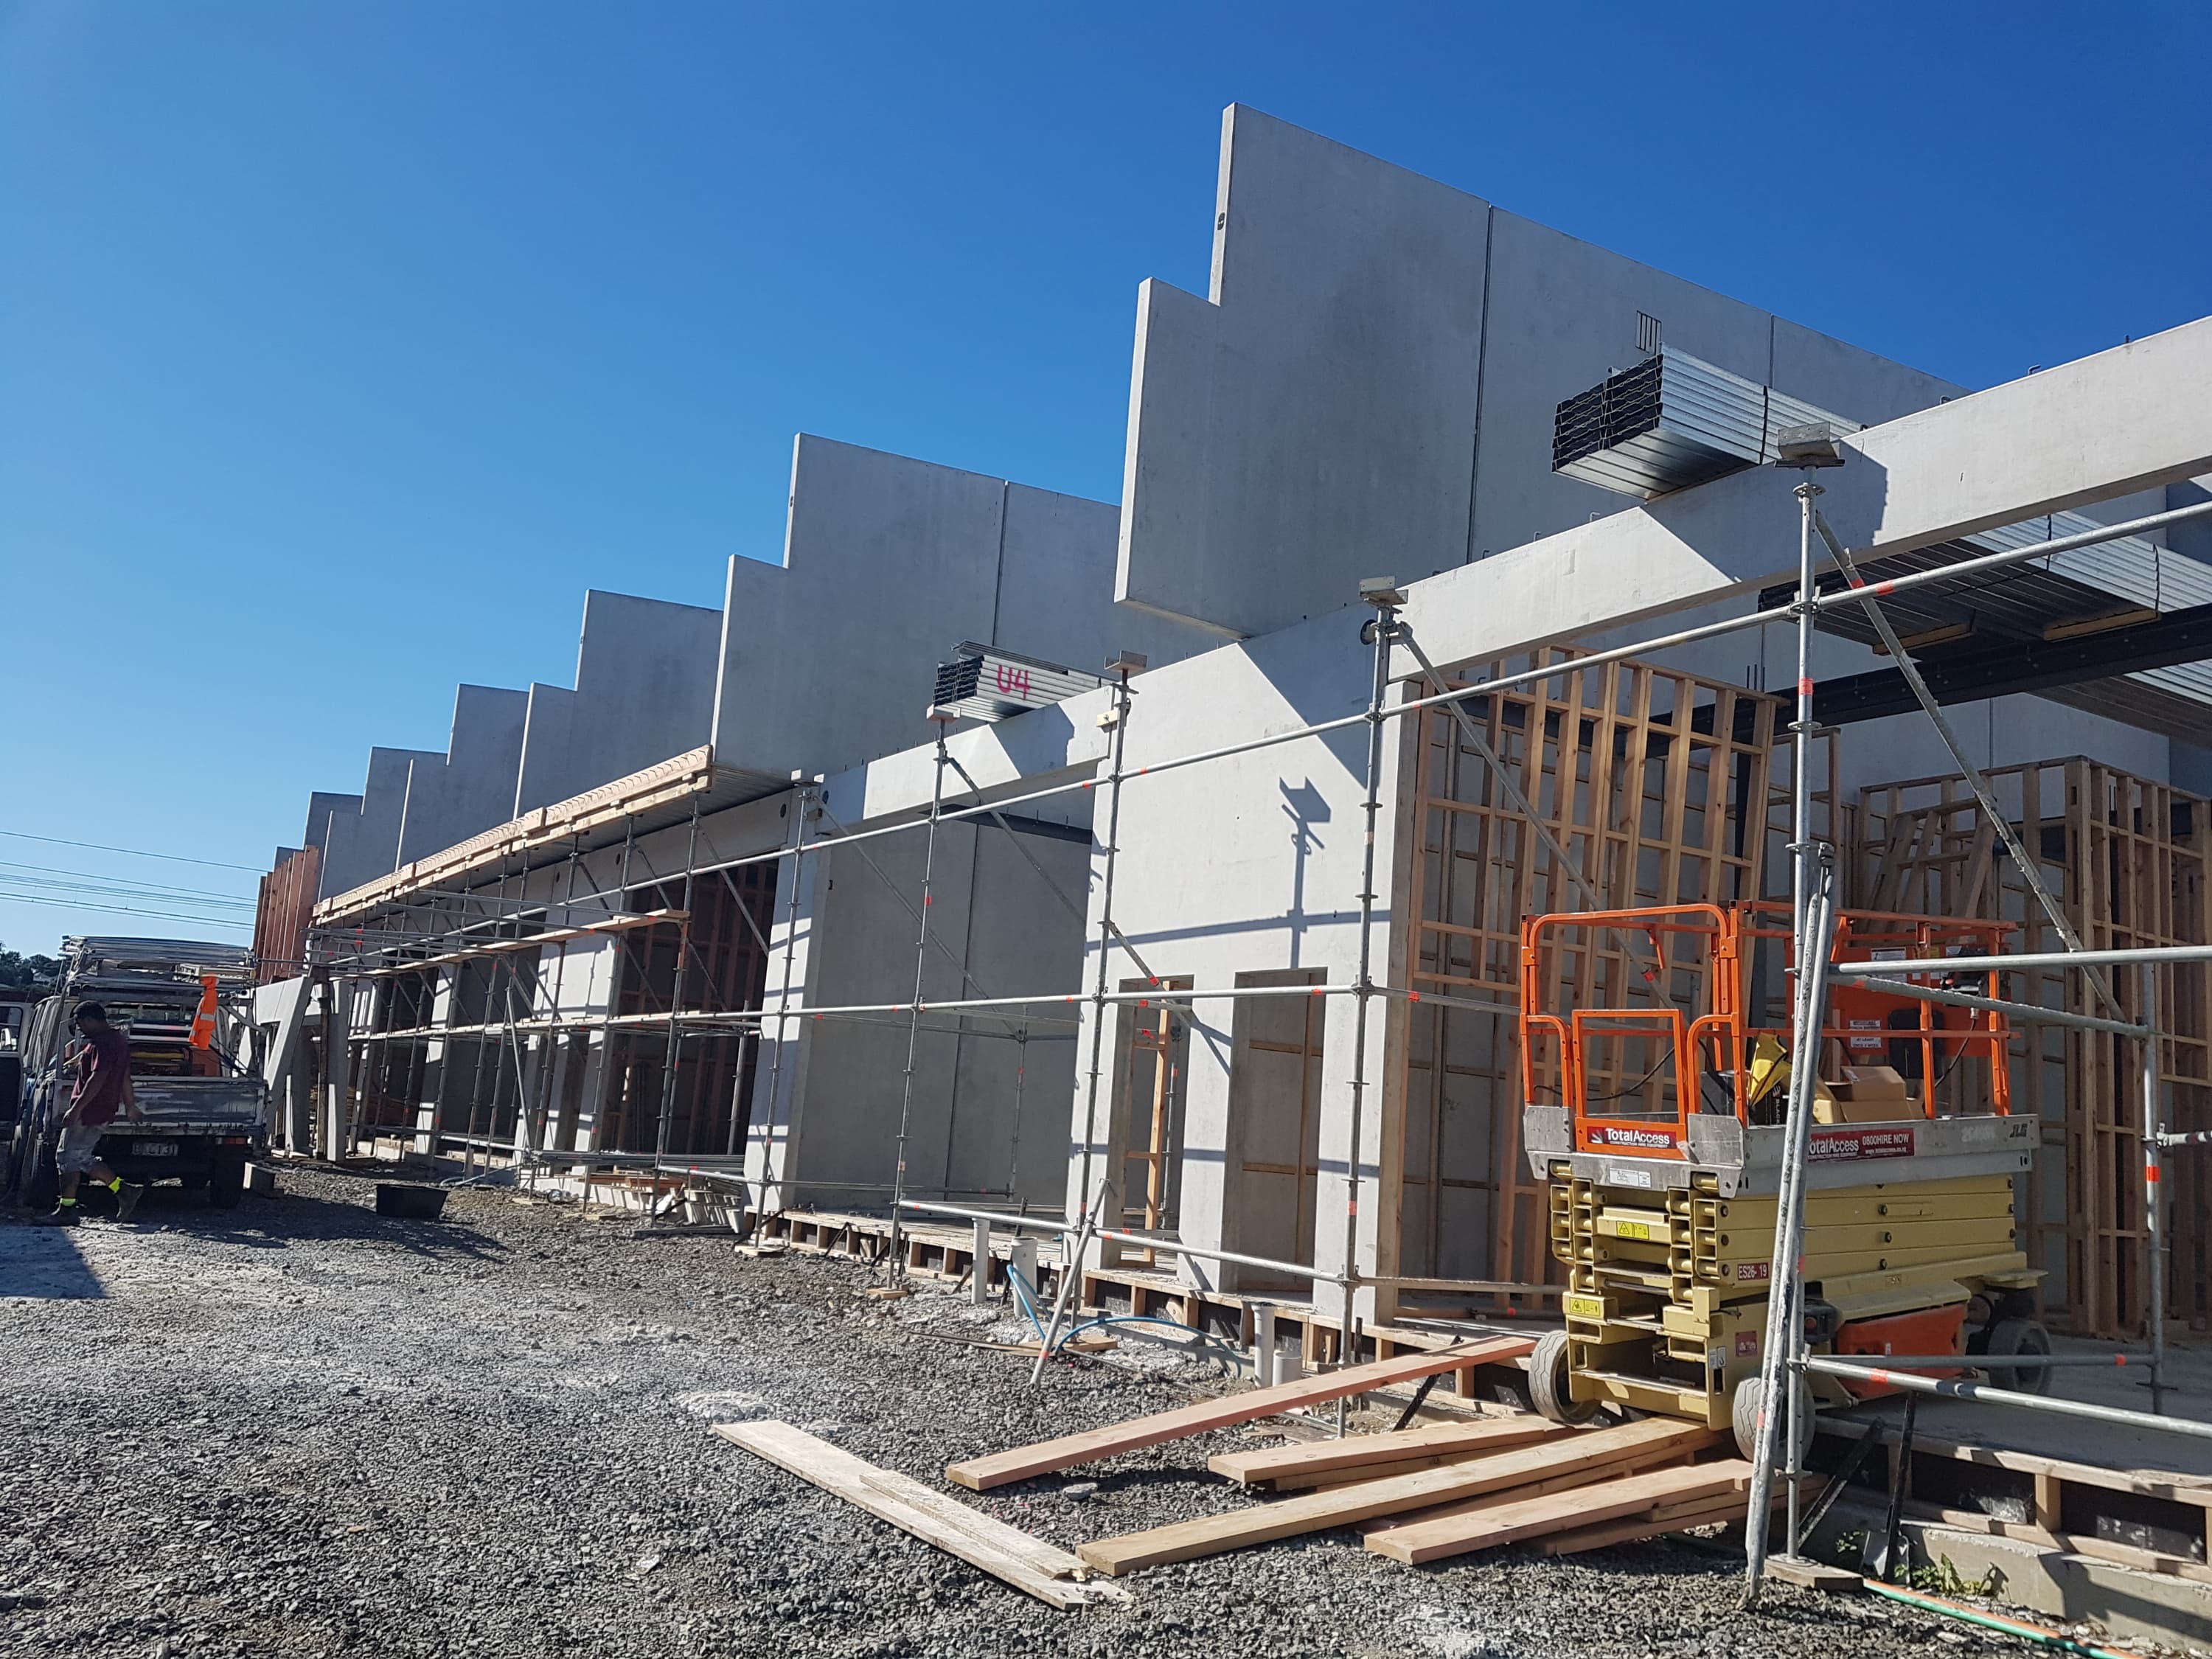
Tilt slab — also called tilt-up — is a construction method where large reinforced concrete wall panels are cast flat on the building's floor slab, then lifted into their final vertical position using a crane. Once the panels are upright and braced, they are connected together and to the roof structure to form the completed building envelope.
The name describes the action exactly: the panels are cast horizontally, then tilted up. It sounds simple, and in many respects it is — which is precisely why it is so efficient. Rather than building formwork, pouring walls in place, and waiting for them to cure at height, the entire process happens at ground level. The crane does the heavy lifting in a single day or two, and the building frame is essentially complete.
Tilt slab has been widely used in New Zealand for warehouses, distribution centres, retail big-box stores, cold stores, manufacturing facilities, and schools since the 1980s. It suits any project that needs large, repetitive wall panels — and it delivers those walls faster and more economically than almost any alternative build system.
A single crane day can tilt and brace enough panels to enclose a 2,000 m² warehouse — work that would take weeks with traditional poured-in-place concrete.
The Tilt Slab Process: Step by Step
Understanding each stage of the tilt slab process helps you plan your project timeline, manage your budget, and ask the right questions of your contractor.
1. Site Preparation and Ground Slab
The ground slab is the casting bed for all the panels, so it must be engineered, level, and strong enough to carry the panel loads during casting. Sub-base compaction, drainage, and slab thickness are all designed with the panel casting in mind. A bond breaker — a chemical release agent — is applied to the slab surface so the panels can be lifted free cleanly after curing.
2. Panel Layout and Reinforcement
Panel outlines are set out on the slab according to the structural drawings. Reinforcing steel is placed inside each panel outline, along with cast-in items: lifting inserts, bracing hardware, electrical conduits, window blockouts, and connection plates. The reinforcement layout follows NZS 3101 requirements, with additional detailing for seismic connections at panel-to-panel and panel-to-roof junctions.
3. Concrete Pour
Concrete is placed and finished within each panel outline. Most tilt slab panels are 150–200 mm thick for standard commercial heights, thicker for taller panels or heavier loads. The top face of each panel becomes the finished exterior face of the building, so surface quality matters — honeycombing, voids, or poor finishing require repair before the panels are lifted.
4. Curing
Panels are covered and cured until they reach the design strength specified for lifting — typically around 20–25 MPa, though the structural engineer determines the minimum based on panel size, shape, and lift points. In New Zealand conditions, this usually takes 7–14 days depending on season and concrete mix.
5. The Panel Lift
The crane day is the most visible part of the process. A mobile crane — often a 100 to 400-tonne capacity machine depending on panel size — attaches to the lifting inserts cast into each panel. Panels are lifted one by one, rotated from horizontal to vertical, and set onto their foundation connections. Steel braces are immediately attached to hold each panel plumb until all panels are connected and the roof structure is in place.
6. Connections, Grouting, and Topping
Once panels are standing and braced, the structural connections are completed: panel-to-panel joints are formed and grouted, base connections are completed, and the roof structure is attached. A concrete topping slab may be poured over the ground slab depending on the specification, and the building envelope is effectively complete — ready for fit-out.

Tilt Slab vs Precast vs Poured-in-Place: Key Differences
There are three main ways to build concrete walls for commercial and industrial buildings in New Zealand, and each suits different project types.
- →Tilt slab (on-site casting)— panels are cast on the building's own floor slab, then tilted into place. No transport costs, no factory, no storage. Best for large footprint buildings where casting space is available on site.
- →Factory precast — panels are manufactured off site in controlled conditions, then transported to site and craned into position. Offers tighter quality control and can be produced while the site is prepared, but transport limits panel size and adds cost. Better suited to complex or architectural panel finishes.
- →Poured-in-place concrete — walls are formed and poured in their final vertical position. Maximally flexible for complex shapes and openings, but requires formwork erection and stripping at height, is slower, and is generally more expensive for simple rectangular wall runs.
For large commercial and industrial builds with straightforward rectangular footprints, tilt slab typically wins on cost and programme. For projects with complex geometry, restricted sites, or high architectural finish requirements, factory precast or poured-in-place may be preferable.
When Tilt Slab Is the Right Choice
Tilt slab delivers the greatest value in a specific range of project types. You should strongly consider it when:
- →Large floor area:warehouses, distribution centres, and cold stores with 1,000 m² or more of floor area benefit most from tilt slab's economies of scale. The casting and crane mobilisation costs are spread across more panels.
- →Repetitive panel geometry: buildings with similar panel sizes and shapes — typical of industrial and retail builds — let the formwork, reinforcement, and pour process become highly efficient.
- →Flat, accessible sites:tilt slab requires a large mobile crane and unobstructed space around the building perimeter. Greenfield industrial and commercial sites in New Zealand's regional centres are ideal.
- →Fast programme:if your project has time pressure — lease commitments, seasonal trading deadlines, or investment timelines — tilt slab's compressed construction programme is a significant advantage.
- →Durable, low-maintenance exterior: tilt slab panels offer excellent durability, fire resistance, and thermal mass. They require minimal maintenance compared with steel or timber cladding systems.
When Tilt Slab Is NOT the Right Choice
Tilt slab is not a universal solution. There are projects where it will cost more or be impractical:
- →Small footprints: the crane mobilisation, ground slab preparation, and panel casting setup costs are largely fixed regardless of scale. On a small site, these fixed costs make tilt slab uneconomical compared to conventional construction.
- →Complex shapes and curved walls:tilt slab works best with straight walls and rectangular forms. Curved panels are possible but require specialist formwork and are expensive. Complex multi-angle footprints reduce the method's efficiency advantages.
- →Restricted crane access: if the site has overhead power lines, adjacent buildings, or other obstructions that prevent a large mobile crane from operating around the building perimeter, tilt slab may not be feasible — or will require expensive solutions such as a crawler crane or internal lifting.
- →Multi-storey buildings: tilt slab is primarily a single-storey system for commercial and industrial uses. Multi-storey applications exist but require significantly more complex structural engineering and are not common in New Zealand practice.
- →Sites with poor ground conditions:if the subgrade cannot support the casting slab and heavy crane loads, remediation adds cost. Soft or unstable sites require ground improvement or piled foundations that may offset the method's cost advantages.
NZ-Specific Considerations: Seismic, Wind, and Compliance
New Zealand's seismic and wind environment places demands on tilt slab construction that differ from practice in Australia or the United States. Getting these details right is non-negotiable.
Seismic connectionsare the most critical NZ-specific consideration. The panel-to-panel joints, panel-to-foundation connections, and panel-to-roof connections must all be designed and detailed to transmit seismic forces in accordance with NZS 3101 (Concrete Structures Standard) and NZS 1170 (Structural Loading Standard). The connection detailing in higher seismic hazard zones — particularly in Wellington, Hawke's Bay, and the Canterbury region — is substantially more onerous than in lower seismic zones like parts of Northland or Otago.
Wind zonesaffect panel thickness, connection design, and the sizing of openings. Coastal sites and exposed hill sites require panels designed for higher wind pressures under NZS 1170.2. In NZ's high wind zones, tilt slab panels' mass and stiffness are actually an advantage over lighter cladding systems.
Panel reinforcement for NZ conditions typically means more steel than you would see in an equivalent Australian tilt slab project. The ductility demands of NZS 3101 mean that connection zones and panel edges are more heavily reinforced, which adds cost but is essential for life-safety performance.
Always engage a New Zealand-registered structural engineer with specific tilt slab experience for your project. NZ seismic design requirements are not interchangeable with Australian or American standards.
Cost Factors: What Drives Tilt Slab Project Costs
Tilt slab is cost-competitive, but the final cost per square metre varies significantly based on project specifics. Understanding the main drivers helps you budget more accurately.
- →Panel count and size: larger panels mean fewer lifts and fewer joints, but require a larger crane and more careful structural design. Smaller panels are easier to manage but increase joint count and connection costs. The optimal panel size depends on the building geometry and crane availability.
- →Panel height: taller panels require thicker cross-sections and more reinforcement to resist bending during the lift. Panels over 10–12 metres tall are significantly more expensive per square metre than standard 6–8 metre industrial panels.
- →Openings and embeds: each door, window, louvre, or service penetration requires a blockout, additional reinforcement around the opening, and careful detailing. A simple warehouse with few openings is markedly cheaper per panel than a commercial showroom with large glazed areas.
- →Seismic zone:projects in higher seismic zones (Canterbury, Wellington, Hawke's Bay) require more reinforcement and more complex connection detailing, which adds to both material and labour costs.
- →Surface finish: standard sand-and-cement finishes with paint are low cost. Exposed aggregate, form liner textures, or architectural finishes add significant cost and require specialist finishing trades.
As a broad guide, tilt slab wall construction (supply and erect, excluding foundations and fit-out) for standard industrial buildings in New Zealand typically ranges from $350–$550 per square metre of wall area, depending on the factors above and current market conditions. Always obtain site-specific quotes — these ranges should be treated as budget-planning figures only.
Speed Advantages: How Tilt Slab Compresses Your Construction Programme
Programme speed is one of the most compelling reasons to choose tilt slab for commercial and industrial projects. The method delivers time savings at almost every stage:
- →Parallel work streams: while panels are curing on the slab, other site work continues — footings, services, external works. You are not waiting for a sequential construction process.
- →Fast envelope closure: a skilled tilt slab crew with the right crane can lift and brace enough panels to enclose a medium-sized building in one to two days. Once the roof structure is in place, the building is weather-tight and fit-out can begin.
- →No formwork at height: traditional poured-in-place concrete requires formwork to be erected, panels to be poured and cured, and formwork to be stripped — all at height, all sequentially. Tilt slab eliminates this entirely.
- →Reduced trades on site: fewer trades means less coordination, less congestion, and fewer programme risks. The tilt slab process concentrates the structural work into a compressed timeframe.
For a 3,000 m² industrial building, tilt slab can reduce the overall construction programme by 4–8 weeks compared with conventional concrete or steel alternatives. On projects with lease commencement deadlines or staged handover requirements, that time saving translates directly into revenue.
NZ Concrete Group
Family-owned concrete construction specialists based in Hamilton, Waikato. Over 30 years building concrete homes and commercial structures across New Zealand and Australia.
Planning a Tilt Slab Build?
Get expert advice and a detailed quote from NZ Concrete Group's specialist tilt slab and precast teams.